Wednesday, May 11, 2011

Infinity: Haqqislam Starter Pack

For those of you who don't know already, Inifinity is a skirmish-style tabletop wargame set 175 years in the future. Various regions of the earth are represented by different factions. The Middle East is represented by a group known as Haqqislam or "New Islam." These are humanist Muslims who focus on the pursuit of knowledge. The Haqqislam force is focused on specialists. They have a higher Willpower attribute than most of the other factions and tend to be a bit pricier pointwise.

If you want to learn more about this awesome game or download the free rules go to http://infinitythegame.com/

The starter box comes with six figures and slotted plastic bases for each. These guys (and gal) are stored in small plastic bags and boxed between two layers of foam. The bagging only caused slight bending on one of the figures which was easily fixed.

As they are white metal, the figures required some cleanup. I used my hobby knife and a diamond file for this. The seam lines were sometimes in awkward places (one was along a face...), but they were very small and easily removed. The flash was also quickly removed by a the hobby knife.
Ghulam Infantry
Ghulam Infantry
Blurry Ghulam Infantry
Naffatun
Hunzakut
Janissaire
The sculpts on these guys are beautiful. They are quite detailed, and their faces are very expressive for a 28mm fig. They really do fine work and blow other companies in their field out of the water. I'm looking forward to painting these guys!

Monday, May 9, 2011

Tutorial: Dreadnought Twin-Linked Autocannons on the Cheap

With this weapon option becoming more and more popular, especially with the new Grey Knights codex (S8!), TL autocannons are in demand. There is a relatively simple way to convert them through the aegis defense set from GW, but those run at 20 a pop. If you're running three Dreadnoughts, that can get kinda pricey. This method takes a bit longer, but you'll save some cash.

The easiest version of the dreadnought to convert is the venerable. AoBR guys can be used as well (hey they're cheap on ebay), but they are a bit more difficult to work with. What you're going to do is cut down the arm sockets to symmetrical shapes.You'll have to cut down the pieces a significant amount to get them to this size.
  
On the opposite side of the newly created sponson, drill a small hole and place a magnet inside.
http://www.kjmagnetics.com/ is a good source for magnets.
Cut off the plastic pin on the dreadnought arm and place another magnet. Make sure you test the polarization of the magnets before you glue them.


Now you will need plastic tubing for the barrels.
Using the smaller of the two, determine how long you want your barrels to be. Place the tube in the sponson and mark with a knife where you want it to cut off. 
Glue your piece in the sponson. Do this one by one, so you can gauge the length of the barrels off of your previous barrels.
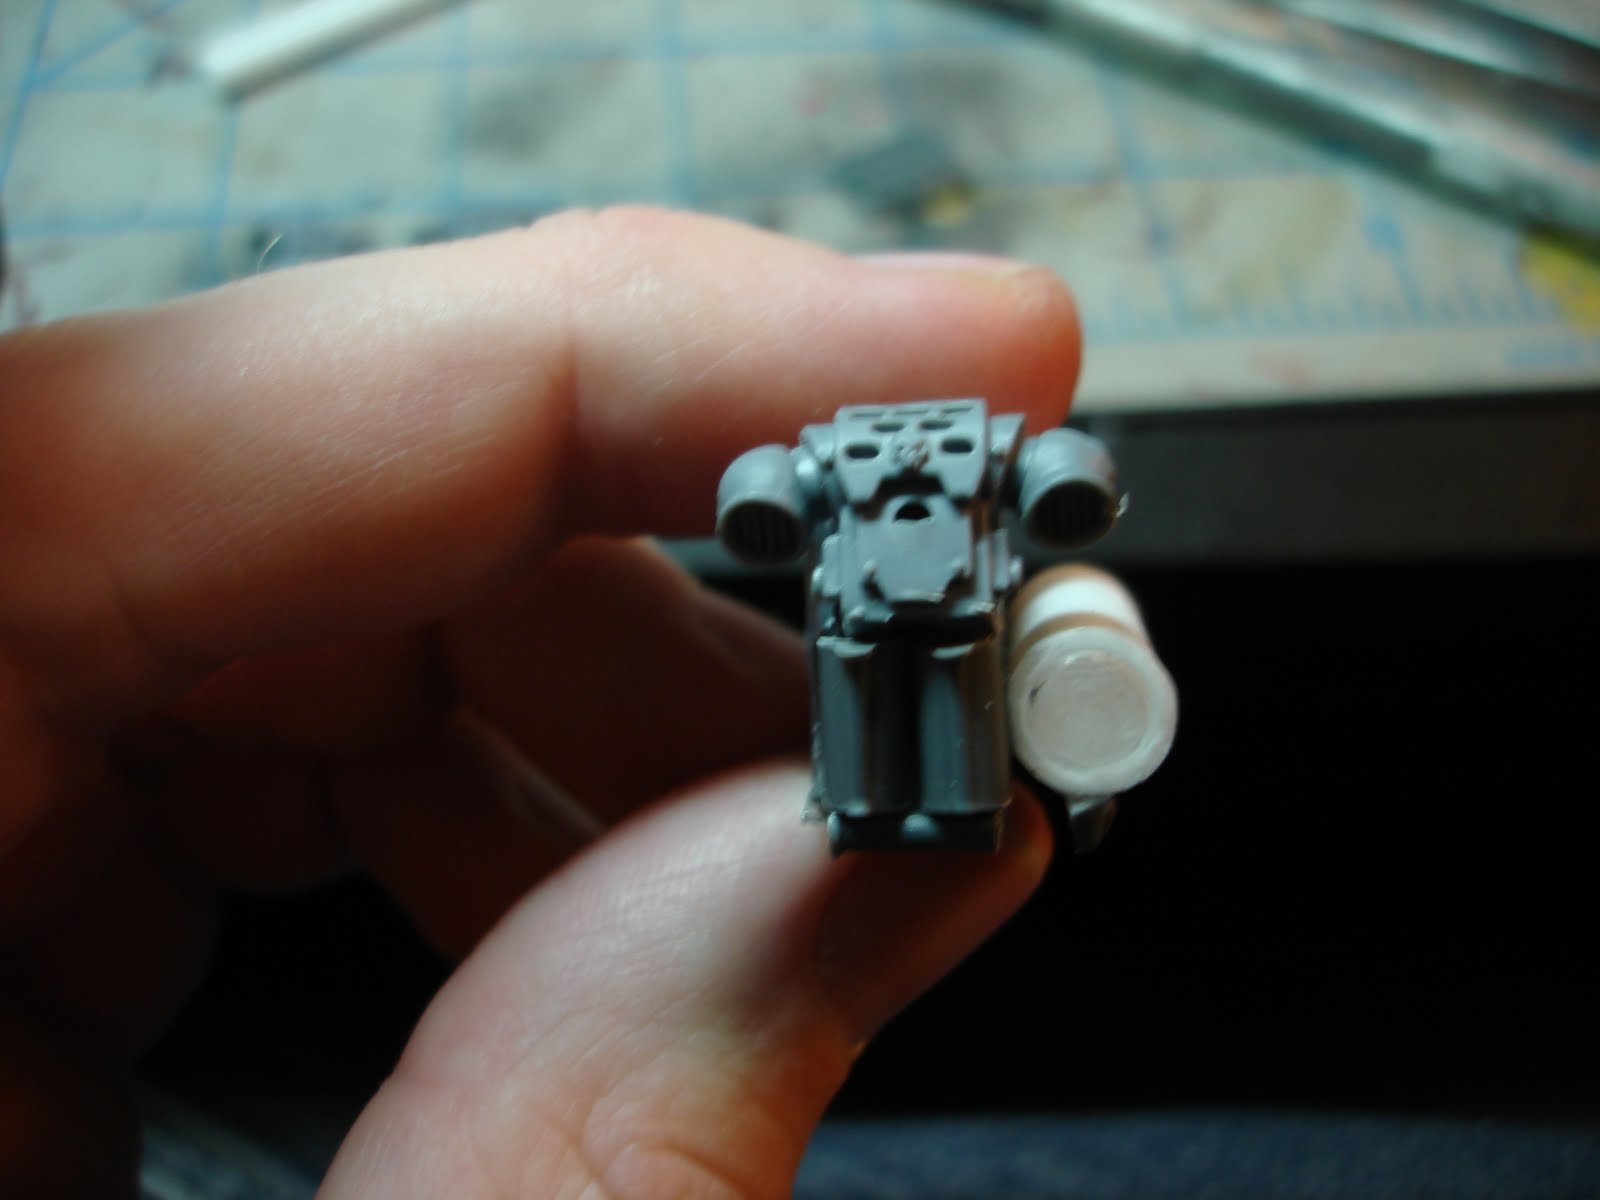
Next, take the large bit of plastic tubing for the ammo cartridge.


Now all of the holes/cuts from cutting down the sponson need to be covered. Instead of going out and buying plasticard, take the plastic from any package you have lying around.
Using your hobby knife, cut this to size for the sides of your sponson and glue them (they can be a bit larger and then be trimmed once dry).

After you trim up the excess plastic, the rest is pretty much up to you. Go to your bits box and add stuff as you like. I took tubing/piping from a flamestorm cannon and tactical marine backpacks.
You can also add a small bit of tubing to the ends of the barrels so they don't look so plain.

Wednesday, May 4, 2011

Wet Blending with Oils: How to Paint Power Weapons

Wet blending with oil paints is much easier than working with acrylics. Oil paints take days to dry, which leaves plenty of time to manipulate the paint to the result you desire.

For power weapons, I use a series of three colors from Winsor & Newton Artist's Oils: Prussian Blue, Ultramarine Green Shade, and Titanium White.
These colors are by no means the only ones you can use (it turns out the ultramarine was a bit dark for my midline color, but oh well).

You will also need a small (0 will do fine) synthetic brush. I have had better results with synthetics than natural hair when it comes to oils (acrylics are a different story). You'll need paper towels too.

Undercoat in the medium range of your desired colors (in this case, a mid/dark blue). Oils, especially some of the lighter colors, become transparent as they are thinned. This makes undercoating a necessity.

Once you have your three colors on your palette, decide which way you want the highlights to go. Using your brush, apply each of the colors equidistant along the weapon, cleaning the brush on the towel between each color application. Apply the colors in a lightest to darkest/darkest to lightest fashion. As the blade below has two angles on each side, I kept my colors restricted to one side of the blade. I'll blend in the opposite direction for the other side to get a more noticeable affect.
When you blend, start in the middle of the color and work the brush toward the adjacent color. Wipe off your brush regularly as the paint will blend on your brush as well. Work the colors back and forth until you have a consistent transition.
The exceedingly dark portion on the blade is a clump of oil paint that needs to be touched up. To do this, completely remove all of the paint from your brush and brush out from the clumped paint to remove it. Don't brush towards your other blended colors as this will ruin what you've just done.

Once the paint has completely dried (several days). Apply a matte coat to protect your hard work!

Here are a few examples of other power weapons done in the same way.

Tuesday, May 3, 2011

Operation: Justicar Update 3 Force Weapons

Here are a few shots of the power/force weapons I've painted up. I used W&N Oils. I'll be posting a full tutorial tomorrow. Enjoy!