I thought this was pretty interesting. They have some good suggestions that would make GW much more customer/retailer friendly.
Thursday, June 9, 2011
Wednesday, May 11, 2011
Infinity: Haqqislam Starter Pack
For those of you who don't know already, Inifinity is a skirmish-style tabletop wargame set 175 years in the future. Various regions of the earth are represented by different factions. The Middle East is represented by a group known as Haqqislam or "New Islam." These are humanist Muslims who focus on the pursuit of knowledge. The Haqqislam force is focused on specialists. They have a higher Willpower attribute than most of the other factions and tend to be a bit pricier pointwise.
If you want to learn more about this awesome game or download the free rules go to http://infinitythegame.com/
The starter box comes with six figures and slotted plastic bases for each. These guys (and gal) are stored in small plastic bags and boxed between two layers of foam. The bagging only caused slight bending on one of the figures which was easily fixed.

As they are white metal, the figures required some cleanup. I used my hobby knife and a diamond file for this. The seam lines were sometimes in awkward places (one was along a face...), but they were very small and easily removed. The flash was also quickly removed by a the hobby knife.

Ghulam Infantry

Ghulam Infantry

Blurry Ghulam Infantry

Naffatun

Hunzakut

Janissaire
The sculpts on these guys are beautiful. They are quite detailed, and their faces are very expressive for a 28mm fig. They really do fine work and blow other companies in their field out of the water. I'm looking forward to painting these guys!
Monday, May 9, 2011
Tutorial: Dreadnought Twin-Linked Autocannons on the Cheap
With this weapon option becoming more and more popular, especially with the new Grey Knights codex (S8!), TL autocannons are in demand. There is a relatively simple way to convert them through the aegis defense set from GW, but those run at 20 a pop. If you're running three Dreadnoughts, that can get kinda pricey. This method takes a bit longer, but you'll save some cash.
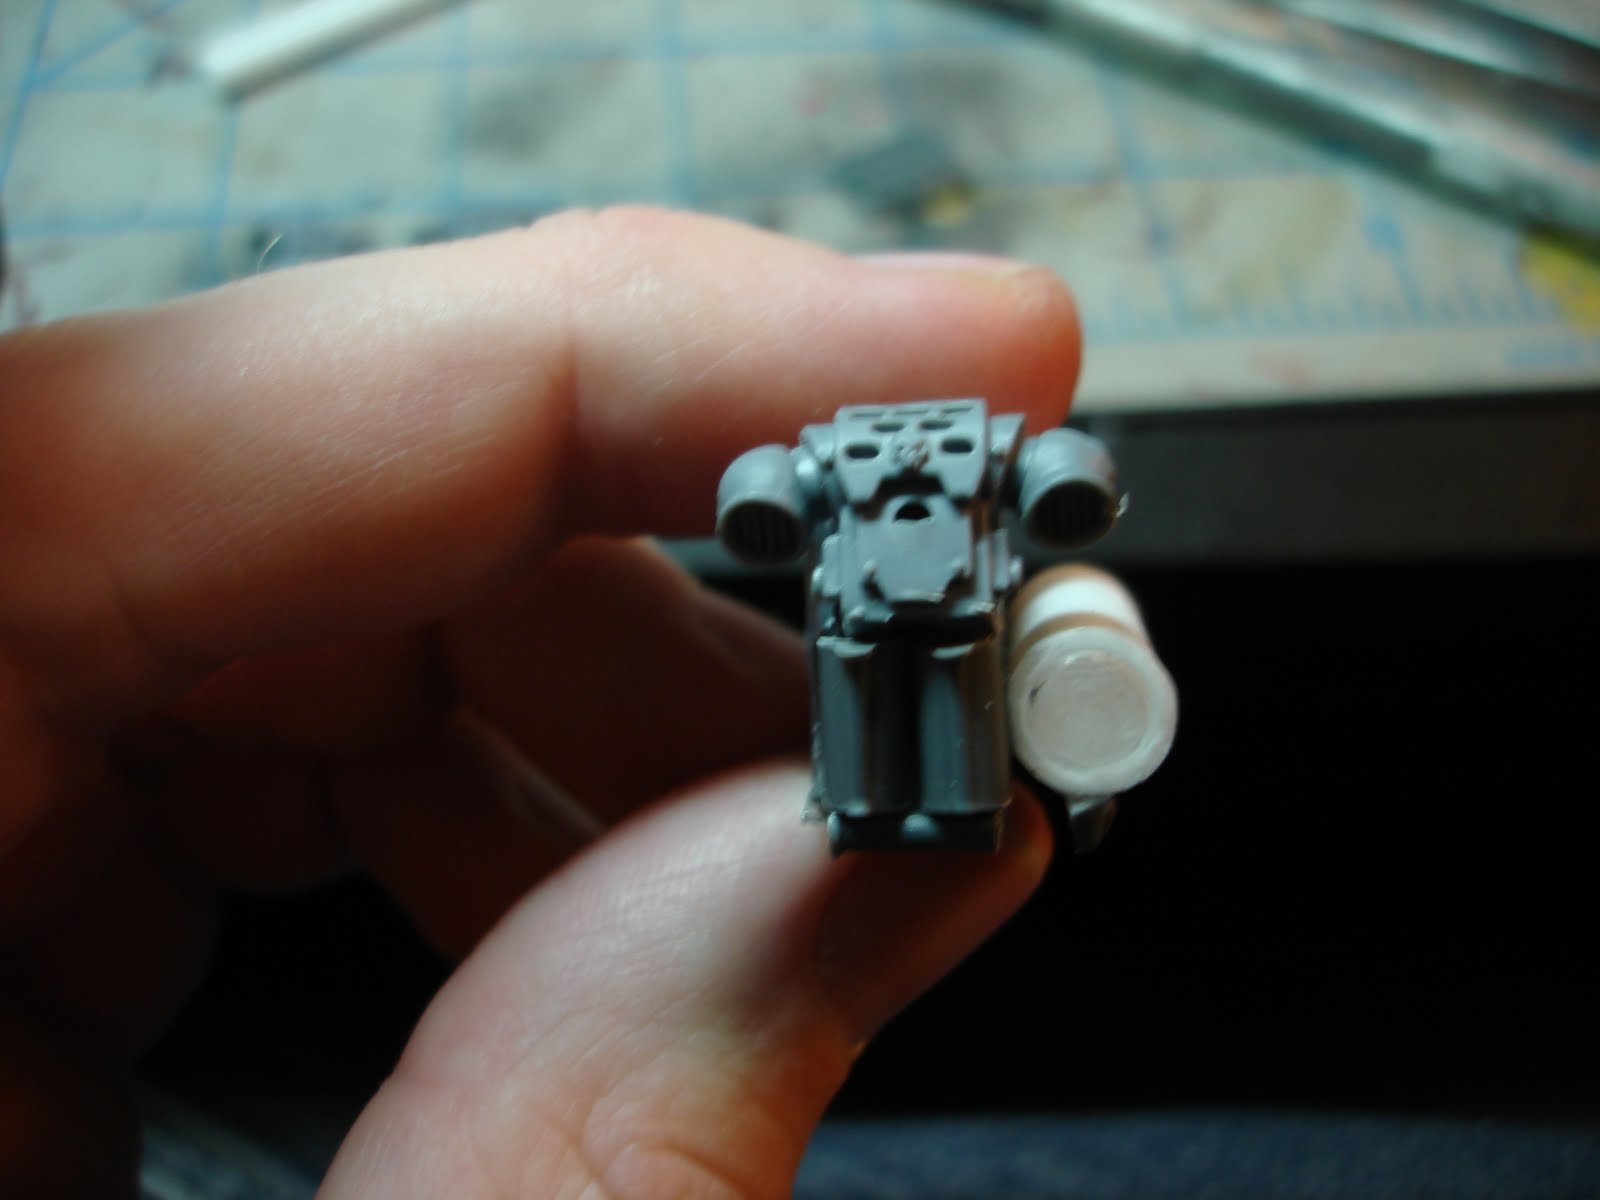
The easiest version of the dreadnought to convert is the venerable. AoBR guys can be used as well (hey they're cheap on ebay), but they are a bit more difficult to work with. What you're going to do is cut down the arm sockets to symmetrical shapes.You'll have to cut down the pieces a significant amount to get them to this size.
 On the opposite side of the newly created sponson, drill a small hole and place a magnet inside.
http://www.kjmagnetics.com/ is a good source for magnets.


 Next, take the large bit of plastic tubing for the ammo cartridge.

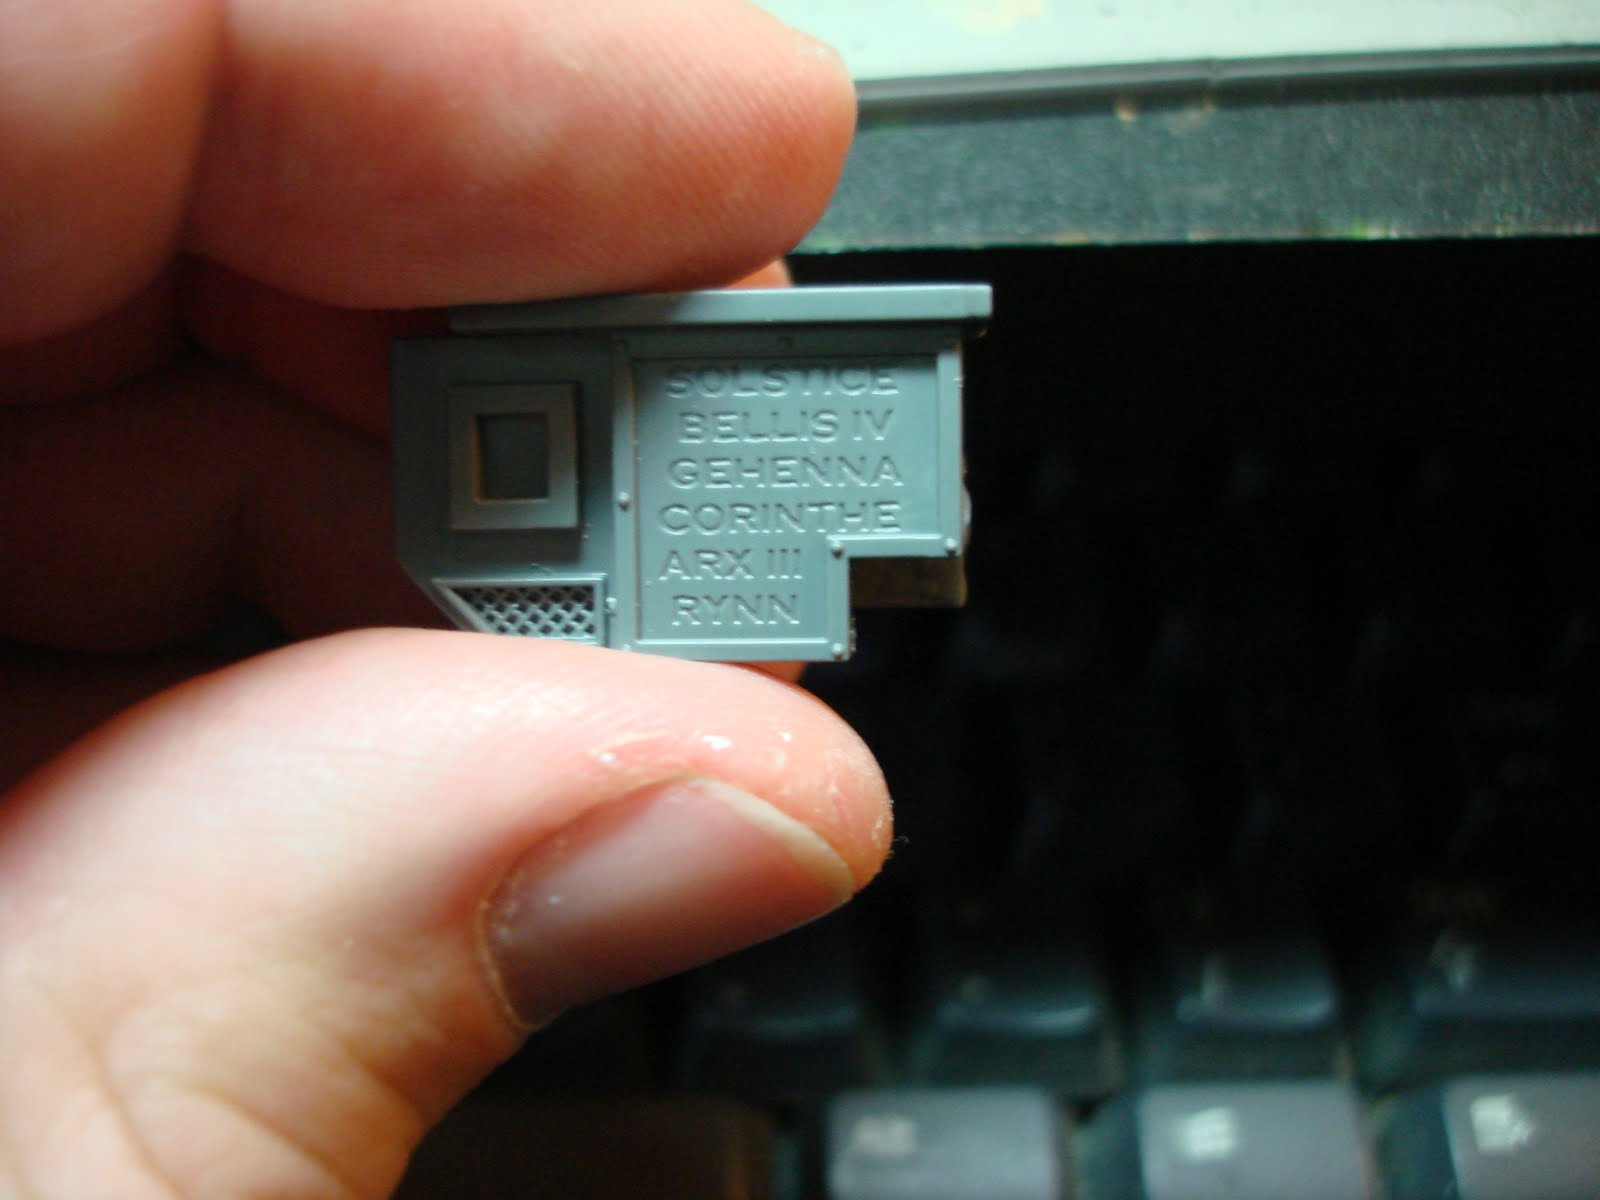
Now all of the holes/cuts from cutting down the sponson need to be covered. Instead of going out and buying plasticard, take the plastic from any package you have lying around.
 Using your hobby knife, cut this to size for the sides of your sponson and glue them (they can be a bit larger and then be trimmed once dry).

 After you trim up the excess plastic, the rest is pretty much up to you. Go to your bits box and add stuff as you like. I took tubing/piping from a flamestorm cannon and tactical marine backpacks.

 You can also add a small bit of tubing to the ends of the barrels so they don't look so plain.
The easiest version of the dreadnought to convert is the venerable. AoBR guys can be used as well (hey they're cheap on ebay), but they are a bit more difficult to work with. What you're going to do is cut down the arm sockets to symmetrical shapes.You'll have to cut down the pieces a significant amount to get them to this size.
http://www.kjmagnetics.com/ is a good source for magnets.

Cut off the plastic pin on the dreadnought arm and place another magnet. Make sure you test the polarization of the magnets before you glue them.


Now you will need plastic tubing for the barrels.


Using the smaller of the two, determine how long you want your barrels to be. Place the tube in the sponson and mark with a knife where you want it to cut off.

Glue your piece in the sponson. Do this one by one, so you can gauge the length of the barrels off of your previous barrels.


Now all of the holes/cuts from cutting down the sponson need to be covered. Instead of going out and buying plasticard, take the plastic from any package you have lying around.


 I'
I'

Wednesday, May 4, 2011
Wet Blending with Oils: How to Paint Power Weapons
Wet blending with oil paints is much easier than working with acrylics. Oil paints take days to dry, which leaves plenty of time to manipulate the paint to the result you desire.
For power weapons, I use a series of three colors from Winsor & Newton Artist's Oils: Prussian Blue, Ultramarine Green Shade, and Titanium White.
 These colors are by no means the only ones you can use (it turns out the ultramarine was a bit dark for my midline color, but oh well).
You will also need a small (0 will do fine) synthetic brush. I have had better results with synthetics than natural hair when it comes to oils (acrylics are a different story). You'll need paper towels too.
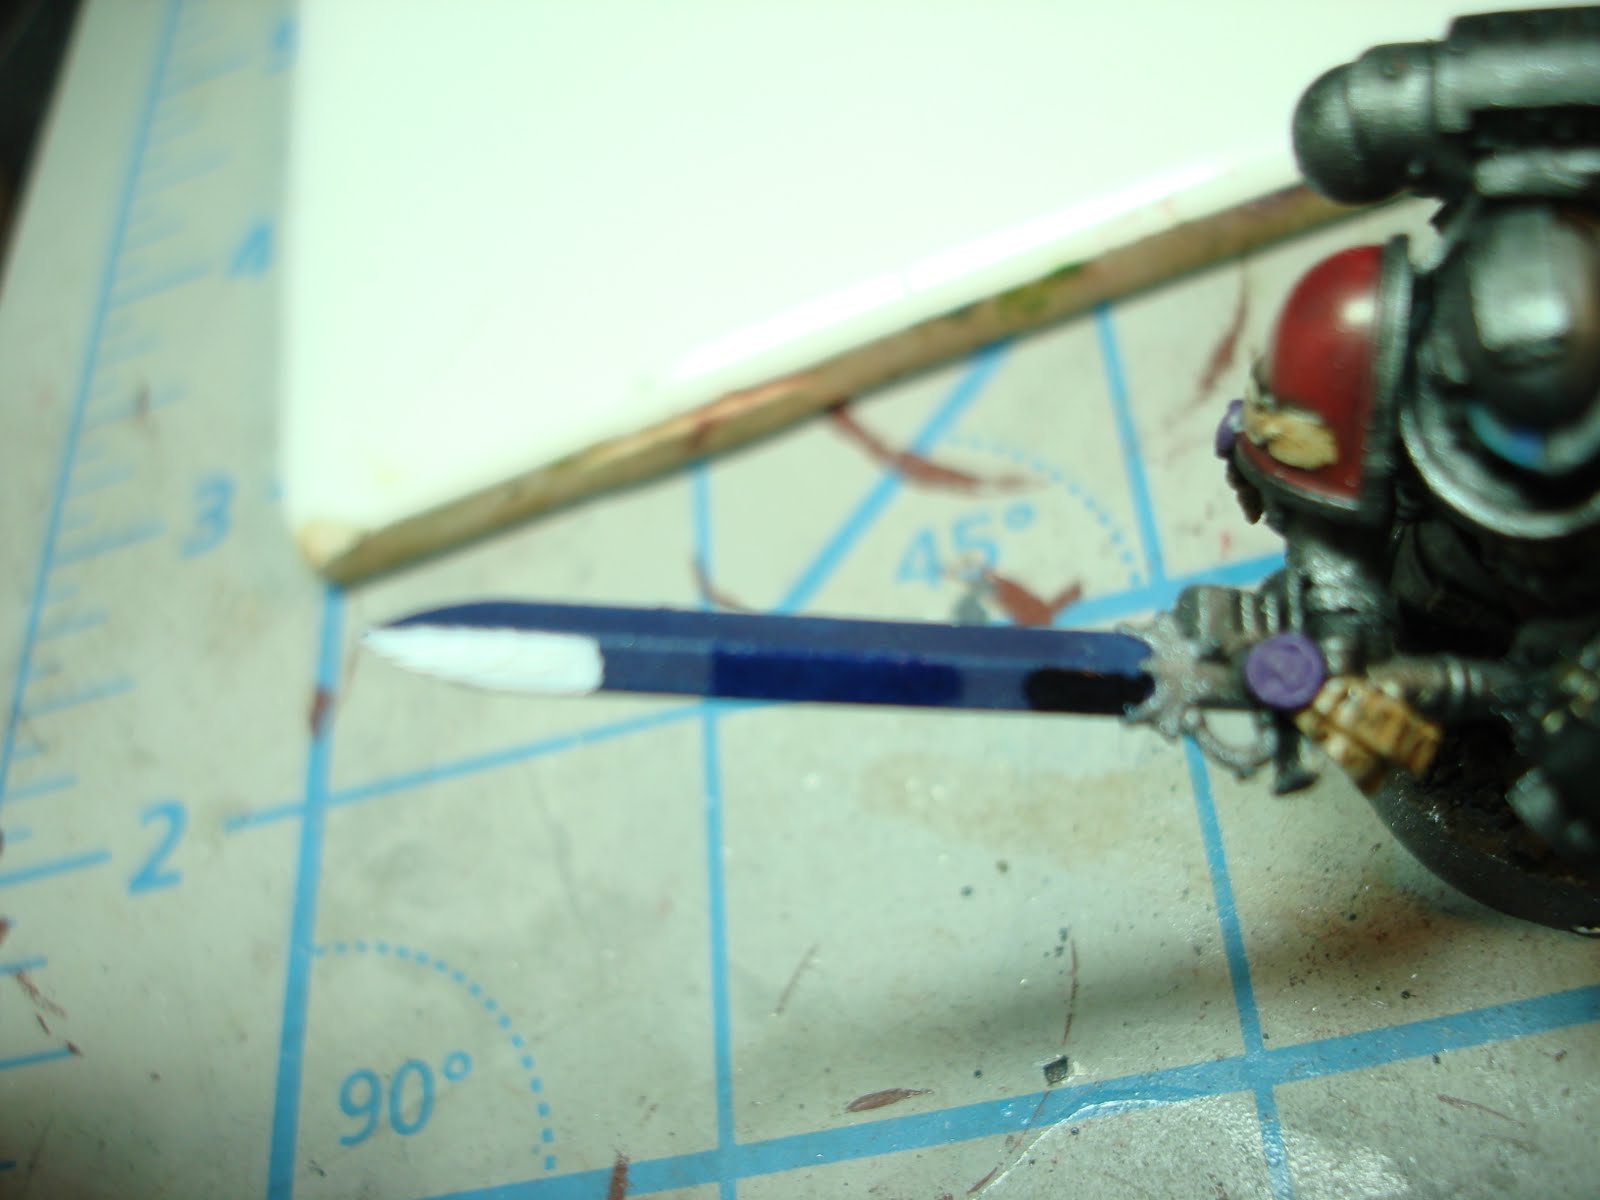
Undercoat in the medium range of your desired colors (in this case, a mid/dark blue). Oils, especially some of the lighter colors, become transparent as they are thinned. This makes undercoating a necessity.

Once you have your three colors on your palette, decide which way you want the highlights to go. Using your brush, apply each of the colors equidistant along the weapon, cleaning the brush on the towel between each color application. Apply the colors in a lightest to darkest/darkest to lightest fashion. As the blade below has two angles on each side, I kept my colors restricted to one side of the blade. I'll blend in the opposite direction for the other side to get a more noticeable affect.
 When you blend, start in the middle of the color and work the brush toward the adjacent color. Wipe off your brush regularly as the paint will blend on your brush as well. Work the colors back and forth until you have a consistent transition.
 The exceedingly dark portion on the blade is a clump of oil paint that needs to be touched up. To do this, completely remove all of the paint from your brush and brush out from the clumped paint to remove it. Don't brush towards your other blended colors as this will ruin what you've just done.
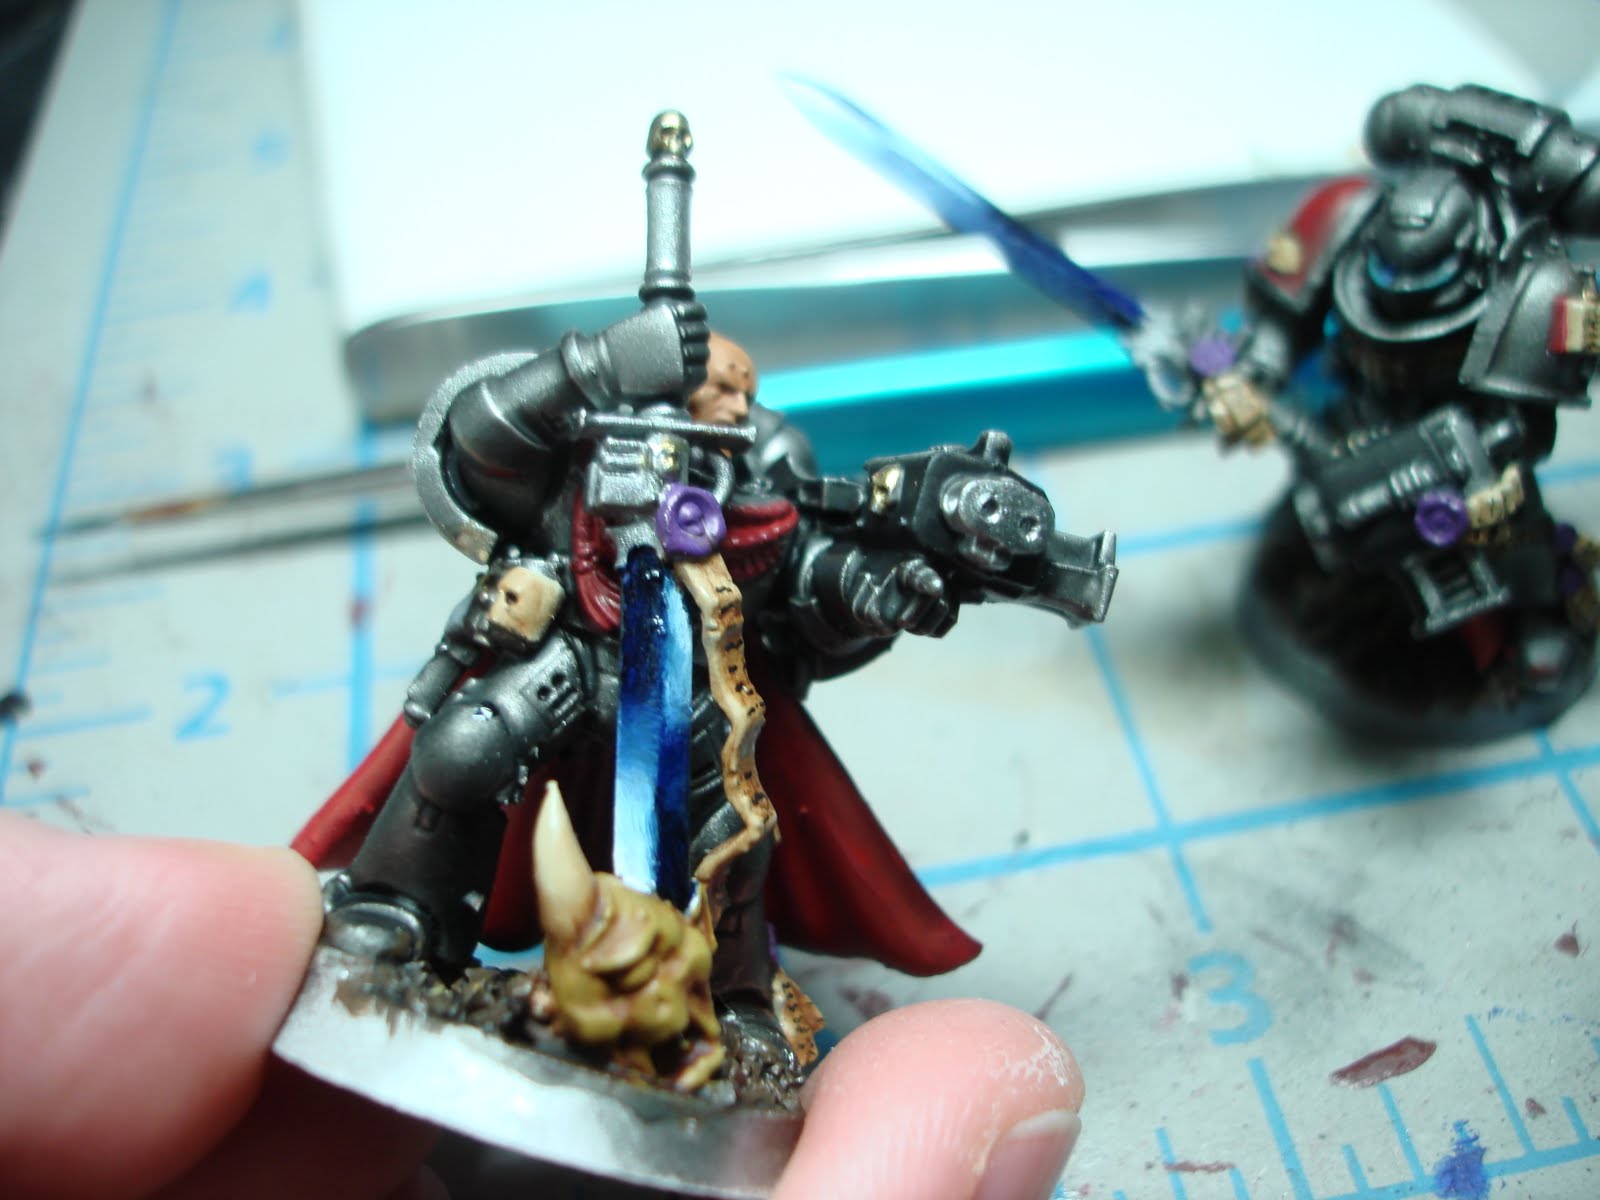
Once the paint has completely dried (several days). Apply a matte coat to protect your hard work!
Here are a few examples of other power weapons done in the same way.


For power weapons, I use a series of three colors from Winsor & Newton Artist's Oils: Prussian Blue, Ultramarine Green Shade, and Titanium White.

You will also need a small (0 will do fine) synthetic brush. I have had better results with synthetics than natural hair when it comes to oils (acrylics are a different story). You'll need paper towels too.
Undercoat in the medium range of your desired colors (in this case, a mid/dark blue). Oils, especially some of the lighter colors, become transparent as they are thinned. This makes undercoating a necessity.

Once you have your three colors on your palette, decide which way you want the highlights to go. Using your brush, apply each of the colors equidistant along the weapon, cleaning the brush on the towel between each color application. Apply the colors in a lightest to darkest/darkest to lightest fashion. As the blade below has two angles on each side, I kept my colors restricted to one side of the blade. I'll blend in the opposite direction for the other side to get a more noticeable affect.

Once the paint has completely dried (several days). Apply a matte coat to protect your hard work!
Here are a few examples of other power weapons done in the same way.


Tuesday, May 3, 2011
Operation: Justicar Update 3 Force Weapons
Here are a few shots of the power/force weapons I've painted up. I used W&N Oils. I'll be posting a full tutorial tomorrow. Enjoy!


Friday, April 29, 2011
Berks Spring Assault 2!
I played against the tourney organizers when they came to the last tournament at Dream Wizards in DC. They were a great group of guys. Several of the Beltway Gamers (local DC group) are going to make the drive up to Pennsylvania to support these guys. This should be interesting as it has a reworked org chart at 1000 points and is played on 4x4 tables... I'm going to try to take mid-range shooty GK, but I'm finding that you can't put too much in 1000 points!
I'll probably run two of the psy ammo dakka dreds along with 2-3 min gk strike squads. I'll put in a min purifier squad in there too... For the hq, because it's only 1000 points, I almost have to make it an inquisitor. I just need to decide how to gear him out.
If you're interested, space is running out quickly. Sign up fast! 25 bucks for four games, lunch and a shot at part of 2k worth of prizes is a steal.
Here are the event details:
BERKS SPRING ASSAULT 2 !!!!
Date: May 14th, 2011
Time: Registration 9:00am-9:45am
Location: Berkshire Heights Fire Company: 808 North Park Rd, Wyomissing, PA 19610
Warhammer 40,0000 tournament: 1000 points. 4 rounds of Warhammer 40K, Lunch included.
$30 entry fee, $25 if pre-registered.
Berks-PA Gaming Club Elite members get an additional $5 discount with club member card shown.
We here are Berks-PA Gaming Club will be hosting our second round of Berks Spring Assault. Last year was an amazing success, despite some issues on planning, as we were new to hosting tournaments. We have a bigger location, better support and lots of fun being planned this year.
Sportsmanship will be key to scoring this year, as much as last year. Details will be posted once we finalize all tournament information. One thing we pride ourselves on, especially with this tournamaent is having FUN! Sportsmanship is a MAJOR part of overall scoring.
Armies do NOT need to be painted, but having painted armies will help as Appearance will be minor part of overall scoring.
For now we can tell you this:
1,000 point Warhammer 40K armies from all standard codex and Chapter approved allowed
Games will be played on 4' x 4' tables, so expect a lot of bloody action! This is Berks Spring ASSAULT!
You will need Six (6) copies of your army list: 1 for the Tournament Ogranizer (me), 1 for you , and 1 copy for each of your opponents. If your list is not legal, you will lose points, be asked to leave, or have your scores adjusted as we see fit.
You will need a copy of the 40K rule book, your codex, all dice and templates and rules associated with your army.
We will play 2 rounds, break for lunch and play 2 more games.
Lunch will be included with your entry fee
We will have 9 prizes available: Best overall, (1, 2, 3), Best Sportsman (1, 2, 3), Best Appearance (1, 2, 3).
We will also recognize Army Domination by best in each codex with a minor prize from one of our sponsors.
We will operate on a much tighter schedule this year and NOT use the same problematic tournament program we had last year, so that things will run a lot smoother.
Last year we had 45 people show up, 38 were players. We will have the capablities to going to 50-60 players this year if needed. we are only 2 blocks away from where the tournament was held last year at the Country Inn & Suites hotel.
FORCE ORGANIZATION CHART:* 1-2 HQ
* 2+ Troops
* 0-2 Elites
* 0-2 Fast Attack
* 0-2 Heavy Support
Forum Link: http://s4.zetaboards.com/Berks_40k_Forum...147/1/#new
Views from last year's event: http://berkswarhammer40k.blogspot.com/se...%20Assault
SPONSORS (so far):
* Battlefoam: http://www.battlefoam.com/
* Mechanicon GT: http://www.themechanicon.com/1/
* FTW Games: http://www.ftwgames.net/
* Dark Forge Games: http://www.blog.darkforgestore.com/
* The Last Level: http://the-last-level.com]
* TerranScapes: http://www.terranscapes.com/
* HazeKnight: http://www.hazeknight.com/main.sc
* Linglestown Paintball: http://www.linglestownpaintball.com/
* The Adventurer's Guild: http://www.theadventurersguild.com/
* Art of War Terrain: http://www.artofwarterrain.com/artofwarw...ghome.html
* RAR Studios
* Battlefield Architecht
* Iron Halo: http://www.ironhalo.net/
Thursday, April 28, 2011
Dilution ratio and components for acrylic wet blending.
I hate the style of extreme highlighting that seems to be so popular in our hobby right now. For me, mini's should look real (even if they're ork's or space elves). I understand the need to see your work from several feet above the gaming table, but some things are a bit extreme.

An alternate to this version of highlighting is wet blending. Wet blending, as the name implies, is blending together colors on the mini before they dry. The easiest way to wet blend when you're painting is with oils. If you're painting an army up for a tourney, client, or other deadline, you may not have time for the extended drying time for these guys to dry (some can take days). Acrylics, while not as good/easy as oils for wet blending, provide another avenue for mini painters to get a good blend.
I have been playing around with different solutions for wet blending with acrylics and the following seems to work best: 10/1 Distilled water/Winsor & Newton Flow improver.
Distilled water is super cheap and you can get it by the gallon at your grocery store. You want to use this over tap-water as it lacks all of the extra minerals and contaminants that most tap water contains (this can mess with your paint).
Winsor & Newton Flow improver can be found at any craft store or the wonderful series of tubes we call the interwebs.
When you use this mixture, generally it will be at a 1:1 ratio. This will vary depending on the level of pigmentation of the paint brand you are using (I did my tests with Vallejo Model Colors/Game Colors). A good way to test that you have the right consistency is when you put some on your brush and paint a small line on your palette, it will be transparent or "bead up" on itself. If you're too thin that's ok. Generally the thinner you go the better (you'll just have to apply more coats).
The cape on the second figure from the left was done with this ratio. First, base the area with a dark coat and allow it to dry. After the base has dried, apply a brighter color mixed with the dilution ratio to the raised areas of the cape. Rinse off your brush and dry it off. The paint on the raised areas should still be wet (don't do too many at once or they will dry). Blend in the wet paint with the surrounding area. You will have to do this several times as the underlying coat will show through due to the highly diluted paint. Mix together the base coat with the dilution ratio and come up from the recesses to blend in with the raised areas. This will obscure the lines between the colors you have made. Again, as you are working with acrylics, it is good to only do a small portion of this at a time so they don't dry. Repeat this process until you have reached the desired level of highlight. You can also add brighter or darker reds to make a more pronounced contrast.
 I hope this helps!

(Sorry if this is yours. The google found it.)
An alternate to this version of highlighting is wet blending. Wet blending, as the name implies, is blending together colors on the mini before they dry. The easiest way to wet blend when you're painting is with oils. If you're painting an army up for a tourney, client, or other deadline, you may not have time for the extended drying time for these guys to dry (some can take days). Acrylics, while not as good/easy as oils for wet blending, provide another avenue for mini painters to get a good blend.
I have been playing around with different solutions for wet blending with acrylics and the following seems to work best: 10/1 Distilled water/Winsor & Newton Flow improver.
Distilled water is super cheap and you can get it by the gallon at your grocery store. You want to use this over tap-water as it lacks all of the extra minerals and contaminants that most tap water contains (this can mess with your paint).
Winsor & Newton Flow improver can be found at any craft store or the wonderful series of tubes we call the interwebs.
When you use this mixture, generally it will be at a 1:1 ratio. This will vary depending on the level of pigmentation of the paint brand you are using (I did my tests with Vallejo Model Colors/Game Colors). A good way to test that you have the right consistency is when you put some on your brush and paint a small line on your palette, it will be transparent or "bead up" on itself. If you're too thin that's ok. Generally the thinner you go the better (you'll just have to apply more coats).
The cape on the second figure from the left was done with this ratio. First, base the area with a dark coat and allow it to dry. After the base has dried, apply a brighter color mixed with the dilution ratio to the raised areas of the cape. Rinse off your brush and dry it off. The paint on the raised areas should still be wet (don't do too many at once or they will dry). Blend in the wet paint with the surrounding area. You will have to do this several times as the underlying coat will show through due to the highly diluted paint. Mix together the base coat with the dilution ratio and come up from the recesses to blend in with the raised areas. This will obscure the lines between the colors you have made. Again, as you are working with acrylics, it is good to only do a small portion of this at a time so they don't dry. Repeat this process until you have reached the desired level of highlight. You can also add brighter or darker reds to make a more pronounced contrast.

Subscribe to:
Posts (Atom)